Categories

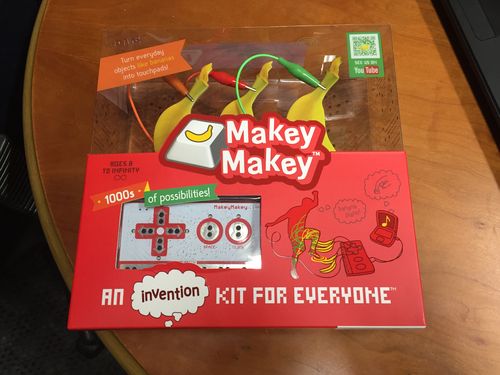
Makey Makey; a revolutionary tool for everyone! Aspiring inventors, little kids and even you!
Today in the office, we tried something a little different. Most people play something like Pac-Man using the arrow keys on your computer keyboard to move Pac-Man around. Oh no, not us, that’s too normal and bland. So, instead, we decided to use a couple of house keys, a keyring and a 50c piece to play.
“But why would you do this?”
 Well, why not?! Technology is an incredible thing, especially with advances that have been made in the past few years. But it doesn’t have to be serious all the time and filled with big words and scary numbers, no sir. If you can turn the fruit basket in your kitchen into a drum set, why wouldn’t you? With Makey Makey, you can invent your way to an incredible time with such a simplistic and cheap piece of technology.
“There's no way it’s this simple, what’s the catch? Is it difficult to use?”
Well, no actually, it really is easy. If you have a computer, and it has a USB port, you’re good to go! The Makey Makey kit comes with everything you’ll need to get started with, but you can easily (and for a miniscule cost) expand the system and turn your entire house into a musical instrument!
Teach me!
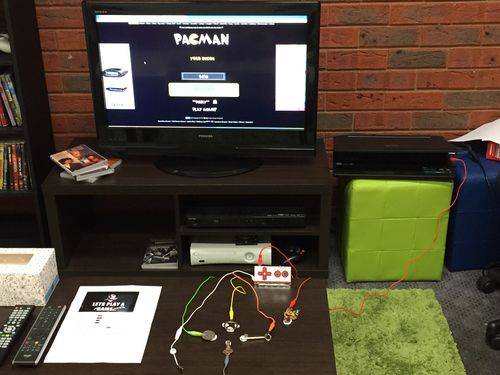 "Well yeah alright then. So, how does it work?”. Well, if you take a look at the following image, I’ll explain it for you.
You need 3 components:
- A computer (almost any computer will work, Windows, Mac or Linux. My laptop is running Windows 8.1 and I've had no problems whatsoever with Makey Makey)
- A Makey Makey kit (which comes with the red cord you see going from the laptop to the board, the board itself and the alligator clips between the board and the objects)
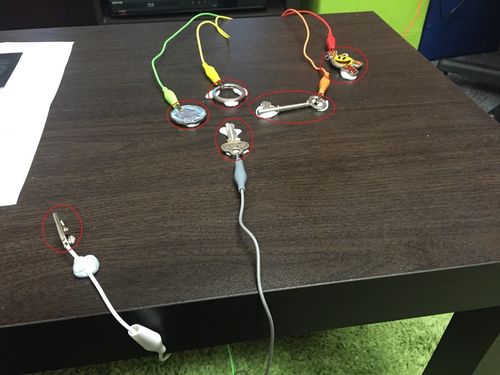
- And finally, objects for you to work with (in my case, a 50c piece, a key ring, two house keys and a Pac-Man symbol that has been conveniently been on my keyring for a year or so)
The Makey Makey board, by default, has holes designed for alligator clips that represent the keyboard arrows (left, right, up and down), the space bar and the left click of your mouse. (You can change these to be whatever you want, but for this I’ve just left everything as it came)
I’ve got the 50c piece hooked up to the left arrow (the green wire), my keyring hooked up to the up arrow (the yellow wire), a house key hooked up to the right arrow (the orange wire) and another house key hooked up to the down arrow (the grey wire).
You might be wondering “Why do you have two extra cords there? The red wire and the white wire, that is”. Well, I’ve got the spacebar hooked up to the Pac-Man symbol, which I’ve got set up to restart the game when somebody presses that. (How I did that is a completely different topic to Makey Makey, I used a piece of software called AutoIt, but I won’t explain how that part works in this article. I may do an article on it in the future, however for now, just imagine the Pac-Man symbol to be a small piece of technological magic that restarts the game). “But what about the white wire?”. Well, for Makey Makey to work, you yourself need to be connected to the board. So, to actually be able to play Pac-Man in this case, you need to be holding onto the white clip. You could simply have the clip taped to your arm or something like that, as long as it’s connected to a conductive part of you, but for this I’ve just made the player hold onto the wire with one hand and play with the other hand.
Let's take a closer look at the board.
“Aahh! What is this thing, you said it was simple!”
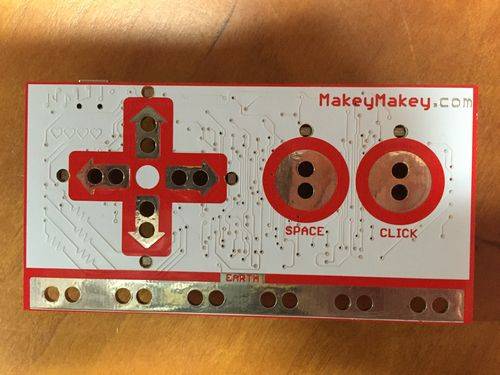
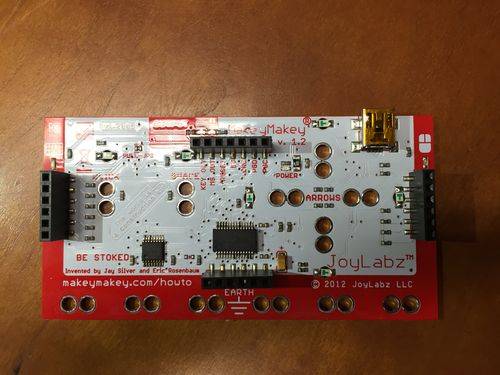
While it can look a little intimidating, it’s actually very simple; allow me to explain. The first image is the front face of the board and the second image is the back face of the board.
As you can see, the front of the board has alligator clip holes for the arrow keys, the space bar and the left click, as well as six different clip holes for “earth”. (This is where the white wire in my case is connected to, so if I wanted, I could have 6 people playing the same game of Pac-Man trying to control him simultaneously. Note to self: Try this out on drunk friends later)
Now; the second image. There’s a lot of things on the back that may seem intimidating to you, but I can’t go through and explain all of the nitty gritties in this article or it will go on forever. However, in this case of our Pac-Man game, I’ve actually connected all of the alligator clips to the back of the board rather than the front so the front of the board isn’t congested with cords. (It doesn’t matter if you connect the cords from the front or the back, it still works the same)
There are additional holes on the back (the four standing black rectangles on the sides that have 6-7 holes each) for other keys besides the arrows, spacebar and left click, such as the page up and page down keys for example, but I haven’t used any of those for this so I won’t go through the boring trouble of explaining all of that to you. (They’re explained in the guide that comes with the Makey Makey kit and on the Makey Makey website however)
At this point, you may be wondering how to actually connect this board of magnificence to your computer. There should be a red cord, with a USB on one end and a mini USB on the other.
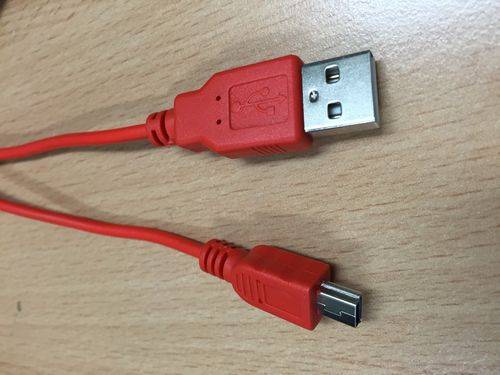
Plug the USB end into your computer’s USB port, and the mini USB end into the Makey Makey board. (The connector for the mini USB is the gold section that you can see on the back of the board, up the top-right corner)
Once you’ve plugged the board into the computer (and assuming your computer is already on), a couple of lights on the board should briefly light up, and then a red light on the back of the board will stay on while the board is plugged in to the computer (this way, if the red light goes off, something has gone wrong).
To know if a button is working or not when you press it, a small green light will flash next to the button on the board. So, in our case, if you press on the 50c piece, the green light next to the left arrow on the board will light up.
And that's all there is to it!
Here's a brief introduction to Makey Makey to get the ball rolling for you. (I personally recommend trying one of these boards out for yourself, it's ~$75 AUD and well worth it in my opinion; if you can think it, Makey Makey can do it!)
Oh, and before I forget. If you lose any component of the Makey Makey kit (except for the board itself), you can easily get some more (such as the alligator clips or the USB connector between the board and the computer) from any electronics store such as Dick Smith, and the best part is, they're not expensive at all, they're actually really cheap! You could go nuts and use 50 alligator clips to connect to something on the other side of your house if you really wanted to, and it wouldn't cost you very much at all!
External links
- Makey Makey
- An awesome musical example
- Get your own! (I strongly recommend it, it really is an awesome piece of tech)
- Free Pac-Man
- AutoIt
UBC Web Design Going Bananas
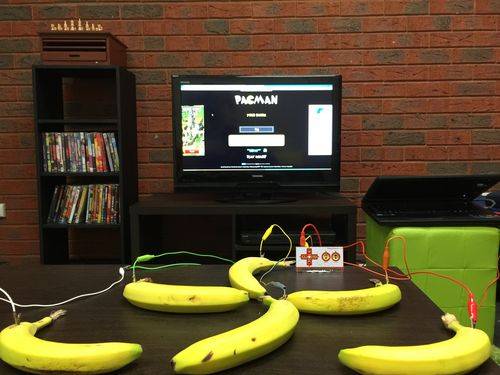
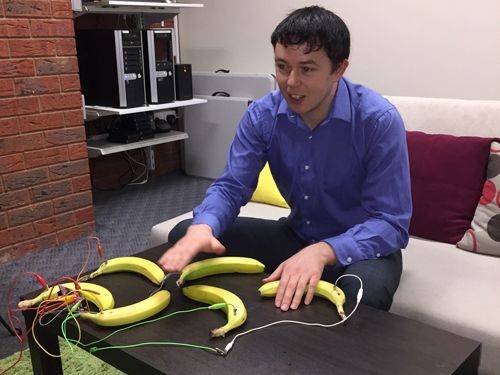
* It is strongly recommended to not eat the bananas after playing Pac-Man with them!

Written by
Ash Plunkett
Programmer / Pac-Man Champion
UBC Web Design
